Using Lightning with Google Calendars
Jump to navigation
Jump to search
Follow the following simple steps to setup Lightning to access your Google Calendar(s). This walk-through is intended for English speakers using Thunderbird with the Lightning extension installed or using Sunbird. It assumes you already have a Google account and have created a Google Calendar. This walk-through applies for all operating systems.
- In your web browser log in to http://calendar.google.com/.
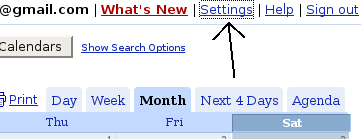
- In the top-right click on the Settings link.
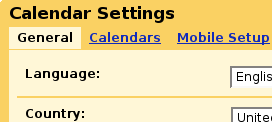
- Click on Calendars.
- To the right of the listed calendar that you wish to use click on "Shared: Edit settings"
- You will be given the options Do not share with everyone, Share all information on this calendar with everyone, Share only my free / busy information (hide details.) Select the share settings that you find appropriate for this calendar. You will be able to import the calendar in Lightning regardless of the option you choose.
- Click on the Calendar Details tab.
- Scroll down to the section with "Calendar Address:" and "Private Address:" If you choose "Do not share with everyone" or "Share only my free / busy information" you must use the Private Address. If you chose "hare all information on this calendar with everyone" then you can use either section.
- Click on
 in the appropriate section as described in the previous step.
 - Right-click on the colored and underlines text that looks like a web site address. In Firefox choose "Copy Link Location" In Internet Explorer choose "Copy shortcut" If you are using another browser choose the equivalent option.
- In Thunderbird switch to calendar mode by clicking on the calendar icon in the bottom-left.
- Right-click on the calendar list and choose "New Calendar."
- Choose "On the Network" and then click on the Next button.
- In Thunderbird make sure iCalendar is selected. In Sunbird make sure Google Calendar is selected.
- Right-click in the Location box and choose Paste.
- Assign a name and color to the calendar and then choose next.
- In the username field put in your Google username and password.
- Click on the Finish button.
Congratulations, your Google Calendar should be setup correctly. Repeat these steps for any additional Google Calendars you wish to add.

