Thunderbird:Help Documentation:Creating an Account
What's here is a decent start, but what's needed is a bit more step-by-step, hand-holding information in my opinion. We also need to stay away from jargon and acronyms as much as possible (and when we have a good glossary, we'll need to judiciously link from here to there).
Another big need here is something that's more, well, integrated. Ideally I'd like to see one single pathway for creating accounts. I don't know if this is even possible (if it isn't, splitting it up via pathways may be the best choice), but of all the documents in Help, this one must be the clearest one. If the user can't get through this one, he definitely won't get through any of the others.
This page will detail the process involved with initial account setup in Thunderbird, along with creating additonal Email, Movemail, RSS News and Blogs, or Newsgroup accounts.
Initial Account Creation
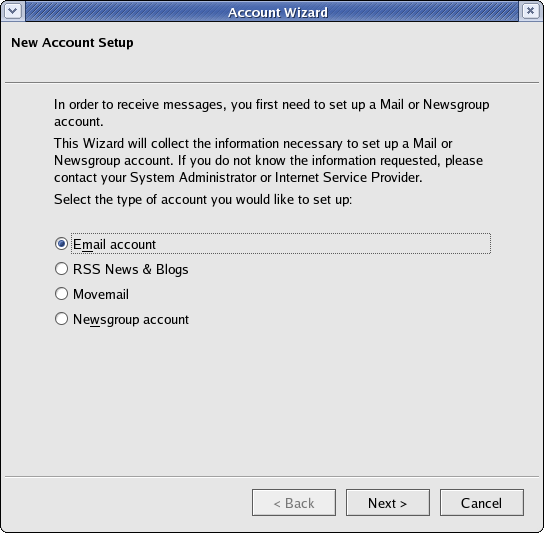
The first time you start Thunderbird, you are presented with an interface to create an account. You have four options available to choose from:
- Email accounts allow you to send and receive messages between specific groups of people.
- RSS_News_and_Blogs
- The RSS News and Blogs feature of &brandShortName allows you to subscribe to RSS, RSS2, or Atom feeds and have the contents of each displayed as mail would be in Thunderbird.
- Movemail
- Movemail is a service on UNIX-like systems to copy mail from the system mail spool into an email client. It is a part of GNU Emacs. Depending upon your operating system, you may need to have GNU Emacs installed to have it.
- Newsgroup
- Newsgroups allow large groups of people to send and receive messages discussing specific topics.
Choosing one of the options will present you with an interface to set up an account for that particular feature. The setup process of each type of account is detailed below. Click on a topic to skip to instructions on how to create that type of account.
Creating an Email Account
Select the Email Account option, then click Next to proceed.
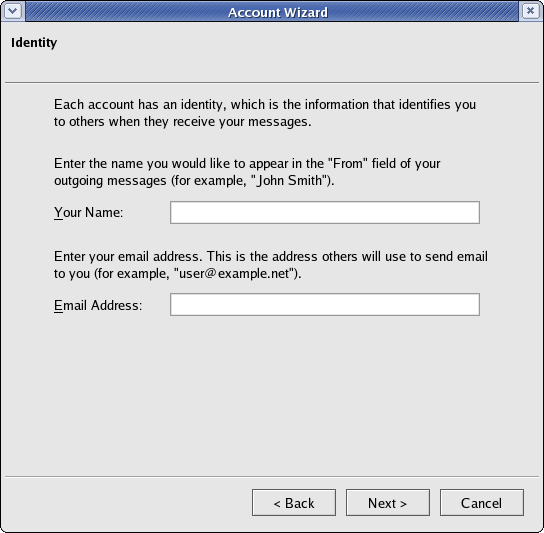
This first dialog asks you for your name and the email address of the account you are setting up. The name you enter here will be displayed by other people when you send them an email. The Email address is the one that you will be receiving mail at. Fill in both and click Next to proceed.
The next screen presents you with two options. The email account can either be an POP Account or an IMAP Account. Contact your ISP or Email provider to find out which you should use. The default is POP and shows the following dialog:
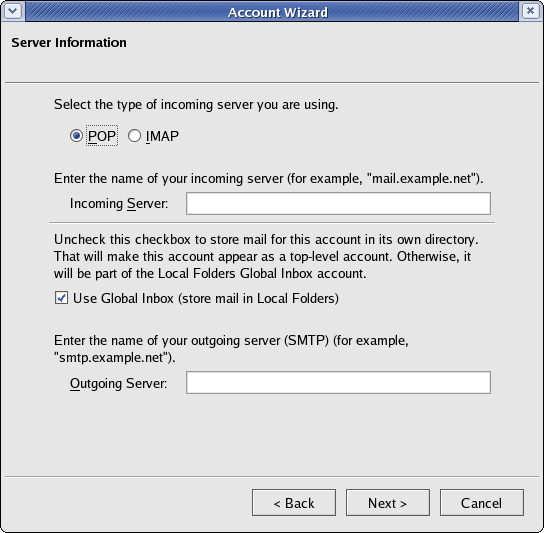
Selecting Global Inbox will cause this account (and any other POP accounts set to use the Global Inbox) to direct all of their mail into a single Inbox, as opposed to each account having its own Inbox.
If you select the IMAP Option, the dialog box will change to resemble this:

Enter the incoming and outgoing server names (supplied by your email provider) and click Next.
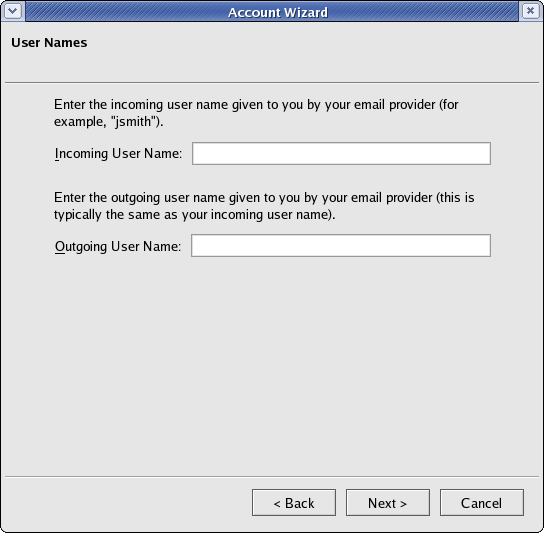
This dialog asks for your incoming and outgoing user names. These are supplied by your email provider. This user name is sent along with your password to log in to the server. The user name for the outgoing server is typically the same as the incoming one. Click Next to proceed.
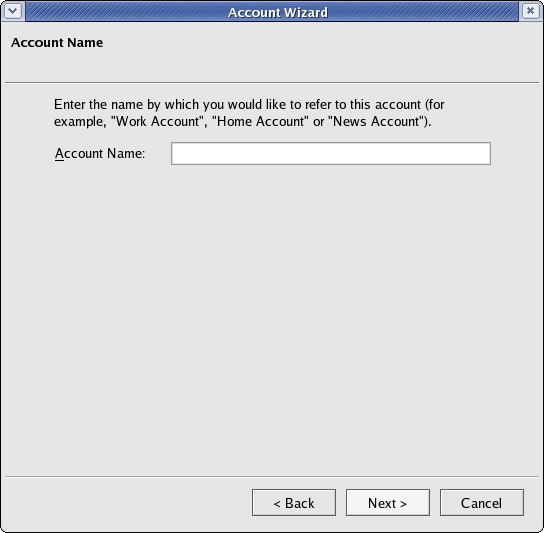
Finally you are asked to enter a name for the account. This name will be displayed and used by &brandShortName to refer to mail coming from this account. You can make it anything you want, but pick something that will make it easy to identify the account. Click Next to proceed.
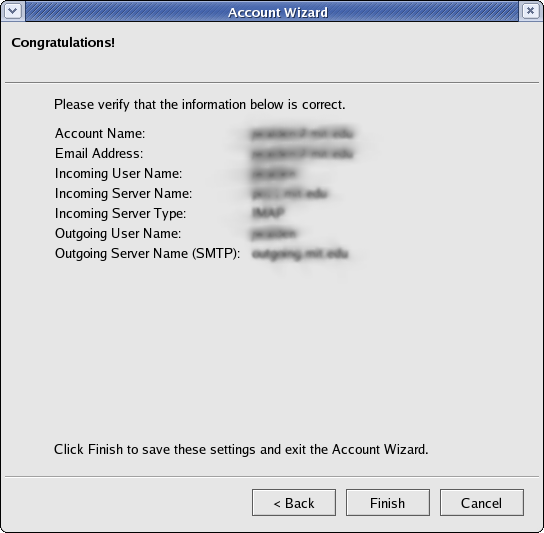
The final screen summarizes the information you have entered. Check it over for any errors. You can also select to immediately check the account for mail. At the end, click Finish and you will be returned to the Account Settings dialog. You may correct any mistakes you mave have made in setting up your account here.
Creating an RSS News and Blogs Account
Select the RSS News and Blogs Account option and click Next. After choosing an account name, click Next then Finish to verify it.
To add RSS, RSS2, or Atom feeds to your RSS News and Blogs account, go to Tools → Account Settings, then select your RSS News and Blogs account. Choose Manage Subscriptions in the right pane of the window. There you will be presented with an interface to set up new feeds.
Creating a Movemail Account
Select the Movemail option, then click Next to proceed.
On the next screen you will be asked to provide your name and your email address. Click Next to proceed. If you have not already set up an SMTP (outgoing e-mail) server in Thunderbird, you will be asked to set one up in the next screen. Otherwise, click Next. On the next screen you can verify your information. When you are satisfied, click Finish to complete the setup of your account.
For help on setting up the movemail service on your system, refer to the Netscape Movemail Page
Creating a Newsgroup Account
Select the Newsgroup account option, then click Next.
After filling in your name and email address, click Next to proceed. On the next screen, you will be asked for the news server's Internet domain name. Fill in the field, then click Next to proceed. Give your newsgroup account a name, then click Finish to complete the setup of your account.