Calendar:Events
Instruction for Lightning on Thunderbird
Creating Events
There are a number of ways you can create new events when you are in "Mail Mode":
- Using the menu item "File" -> "New" -> "Event"
- The short-cut CTRL-I
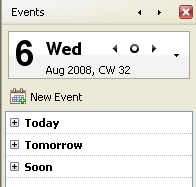
- The "New Event" button in the "Today Pane"
- By double-clicking on "Today", "Tomorrow" or "Soon" in the events overview in the "Today Pane"
In both "Calendar Mode" and "Event Mode" you can use the above methods but you can also use the dedicated "New Event" button in the "Calendar Toolbar".
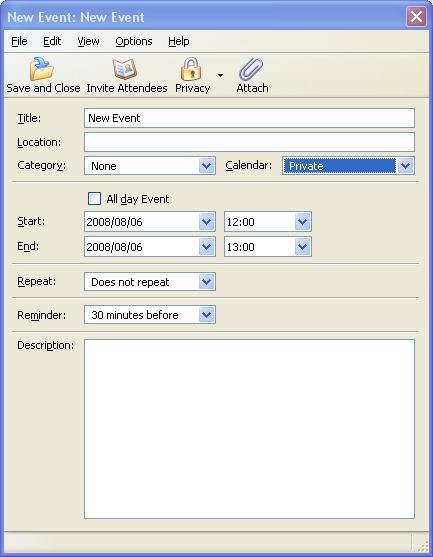
After using one of the above methods a window will appear, in it put the details of the event in the corresponding fields.
- Title: The name of the event. This is what you will see when you first glance at the calendar
- Location: Where the event will be taking place
- Category: What type of event is it?
- Calendar: Which calendar would you like to store the event in (see Creating new calendars)
- Start and End: Choose the time the event begins, and the time that it ends
By default event are assumed to have a start and end date and time.
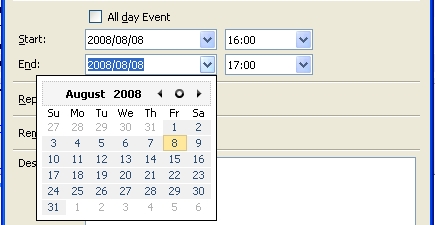
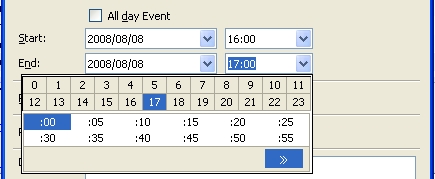
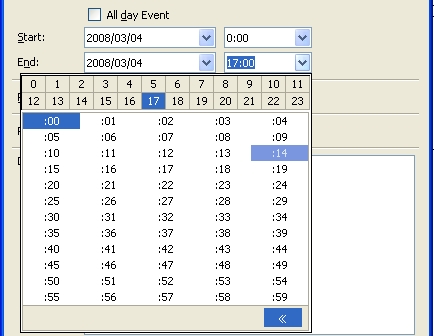
You can set these dates and times by entering them via the keyboard in the respective field or by clicking on the drop-down arrow in that same field. You will than be presented with the following selection options:
When changing the start date, the end date will automatically be set
to the same date.
You select a time by first selecting the hours and than the minutes. The window will close automatically after selecting the minutes.
If you want to use a time that is not shown, you can extend the selections by clicking on the ">>" button at the bottom right.
If the event does not have a start or end time you can select the "All day event" tick-box after which the start and end time will be greyed out.
- Repeat: by default you have the following options:
- Does Not repeat
- Daily
- Weekly
- Every Weekday
- Bi-weekly
- Monthly
- Yearly
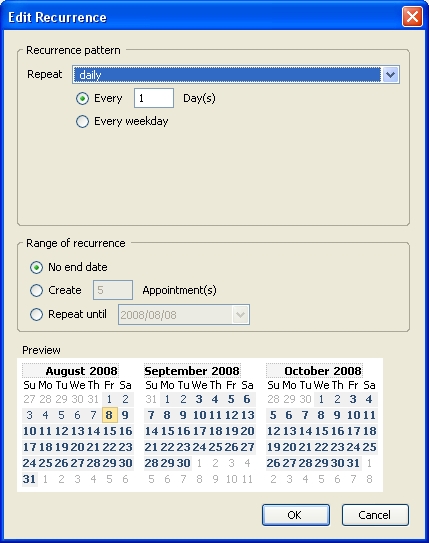
- Custom
The custom option will present you with the following window:
- Reminder: Will pop up with an alarm at a specified time before the event.
You can either select one of the default reminders or define your own custom reminders.
File:Custom reminder window.jpg
It seems like sending emails is not possible yet neither is selecting a
fixed date to fire the allarm.
- Description: A brief summary/list of the event
Add/Invite Attendees
You can add attendees when creating a new event or when editing an event. There are 2 ways you can add attendees when in the "Edit/New Event" windows:
- Using the menu item "Options" -> "Invite Attendees..."
- Using the "Invite Attendees" menu item in the "Events Window"
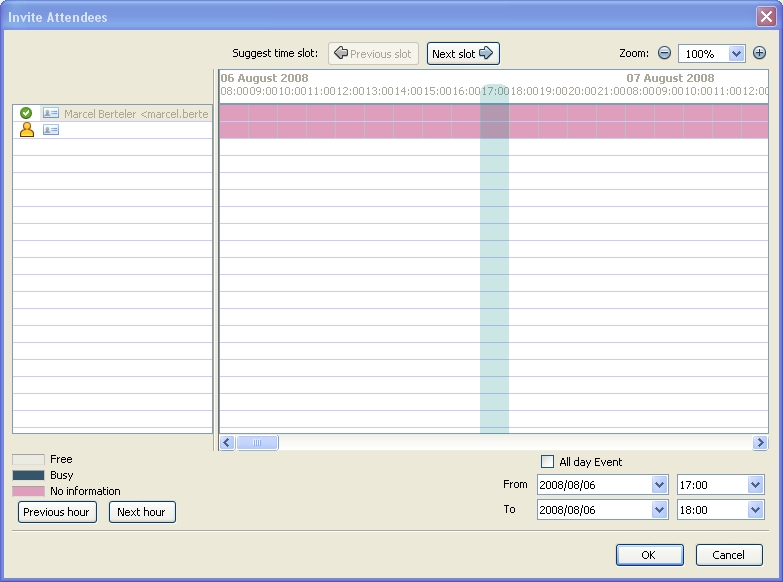
After using one of the methods above, you will see the "Invite Attendee" window:
You can add attendees by adding their email address or name. Your Address book is linked to these fields so auto-complete is working in the same way when composing emails.
Attendees States
You can switch the status of attendees by clicking on the icons in front of their name/email address. The various states are:
Attendees Roles
You can switch the role of attendees by clicking on the icons in front of their name/email address. The various roles are:
The default email personality for the calendar the event belongs to will
be seen as the default CHAIR. You can not un-invite this person or change
this persons role.
