CIDuty/How To/Deprecated / Archived/Slave Management
In general, slave management involves:
- keeping as many slaves up as possible, including
- proactively checking for hung/broken slaves - see SlaveHealth dashboard.
- returning re-imaged slaves to production
- handling nagios alerts for slaves
- interacting with IT regarding slave maintenance
Known failure modes
- HW machines getting unreachable, a reboot is generally needed:
Automated
There are currently no automated mechanisms for recovering individual slaves.
- AWS instances will automatically terminate when idle.
Manual
Rebooting slaves
Find the slave page on SlaveHealth. There's a button to reboot the machine.
Filing bugs for IT
- File a bug using the link in the SlaveHealth page for the slave - it will "do the right thing" to set up a new bug if needed.
- File a "slave is unreachable bug" for IT.
- Note: SlaveAPI will do that automatically when failing to reboot the machine.
- Create dependent bugs for any IT actions. (As of 2017, we should file per-slave bugs for reboots instead of grouping together machines in the same DC into one bug.)
- should block the per host bug (for record keeping)
- consider whether the slave should be disabled in slavealloc, and note that in bug (no slave without a detailed bug should be disabled)
- DCOps assumes if there is no separate bug, they only need to reboot and see the machine come online.
- e.g. bug 1420132.
Slave Tracking
Slave tracking is done via the Slave Allocator. Please disable/enable slaves in slavealloc. You can also disable them directly from the slave page in slave health, e.g. t-w732-ix-001.
NOTE: you no longer need to add the slave-specific bug number to the Notes field. Clicking on the ![]() icon in slavealloc will look up the bug number and status for you, or create a template you can use to file a new bug. If there is another bug, e.g. for IT re-imaging, please add that extra bug number to the Notes field instead using the format: 'bug #######.'
icon in slavealloc will look up the bug number and status for you, or create a template you can use to file a new bug. If there is another bug, e.g. for IT re-imaging, please add that extra bug number to the Notes field instead using the format: 'bug #######.'
Slavealloc
Connecting
Slaves are added to slavealloc via the 'dbimport' subcommand of the 'slavealloc' command.
You will need to ssh as your own user onto the server which hosts slavealloc:
ssh <your user>@relengwebadm.private.scl3.mozilla.com
Staging vs production
The DB urls for staging and production are shared in a PGP encrypted file used by the Release Engineering team. Ask someone else in the team if you do not have this file.
Adding a slave
Once you connect to relengwebadm (see above), to see the help for the slavealloc dbimport command, run:
/data/releng/www/slavealloc/slavealloc dbimport -h
To import data, first you need to create a CSV file, like this one:
name,distro,bitlength,speed,datacenter,trustlevel,environment,purpose,pool,basedir
t-w864-ix-236,win8,64,ix,scl3,try,prod,tests,tests-inhouse-windows,C:\slave
t-w864-ix-237,win8,64,ix,scl3,try,prod,tests,tests-inhouse-windows,C:\slave
t-w864-ix-238,win8,64,ix,scl3,try,prod,tests,tests-inhouse-windows,C:\slave
You'll want a command line something like:
/data/releng/www/slavealloc/slavealloc dbimport -D mysql://user:password@host/DB_name --slave-data <the csv file you just created containing slaves>
Adding a master
Adding masters is similar to adding a slave:
/data/releng/www/slavealloc/slavealloc dbimport -D mysql://user:password@host/DB_name --master-data <csv file containing masters>
The following example shows the required fields, and example values:
nickname,fqdn,http_port,pb_port,datacenter,pool
bm141-tests1-linux32,buildbot-master141.bb.releng.use1.mozilla.com,8201,9201,scl3,tests-use1-linux32
bm142-tests1-linux32,buildbot-master142.bb.releng.usw2.mozilla.com,8201,9201,scl3,tests-usw2-linux32
To get a full list of allowed values for the various normalized fields to use in both import files, you can connect to the mysql database and query the tables directly:
SELECT name FROM bitlengths;
SELECT name FROM datacenters;
SELECT name FROM distros;
SELECT name FROM environments;
SELECT name FROM pools;
SELECT name FROM purposes;
SELECT name FROM speeds;
SELECT name FROM trustlevels;
Please note you'll need to set values in your CSV file that correspond to these allowed values.
The slavealloc dbimport mechanism will convert lines of the CSV file into INSERT sql statements. Non specified fields will essentially be set to NULL. To see how the fields are mapped and normalized, see: https://hg.mozilla.org/build/tools/file/5439f10a7127/lib/python/slavealloc/scripts/dbimport.py#l111 (lines 111-137).
Moving slaves
Connect to relengwebadmn and then connect to the mysql DB.
You have to determine the correct poolid and trustid values.
UPDATE slaves SET poolid=43, trustid=4 WHERE notes LIKE 'bug 917923 - to be converted into try hosts';
Removing slaves
Connect to relengwebadmn and then connect to the mysql DB.
 SELECT name FROM slaves WHERE notes LIKE '%bumblebumble%';
 DELETE FROM slaves WHERE notes LIKE '%bumblebumble%';
Returning a re-imaged slave to production
How to decommission a slave
Windows
I'm hoping to add enough info to demystify Windows and allow anyone to debug a Windows machine.
Start up flow
This is how buildbot starts:
scheduled task (after login) -> start talos bat -> C:\slave\runslave.py
We started logging the start up of runslave.py under C:\slave\runslave.log We do some clean up steps inside of the .bat file.
TODO: correct file names and paths
Trigger buildbot the natural way
You're logged in and you want to trigger buildbot the same way as if the machine had come back from a reboot.
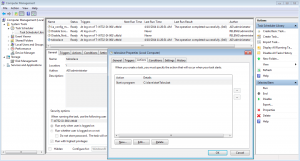
Go to the Task Library, change the property of the scheduled task to allow running manually and hit "run" on the task (more or less).
Infra setup
The Windows machines are managed via GPO.
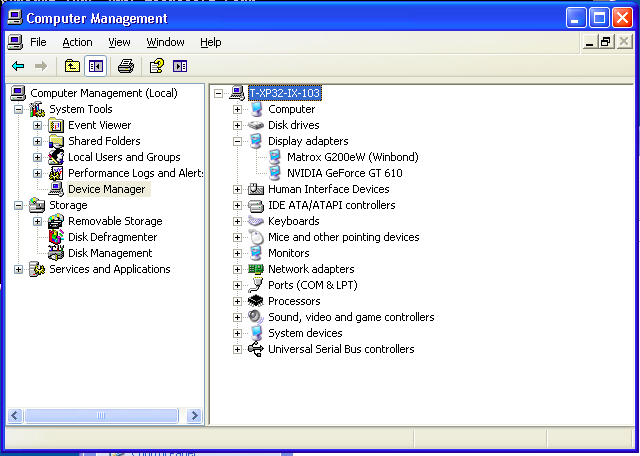
The Windows test machines have the on-board graphics card and a third party graphic card.
The screenshot below shows two devices listed:
root vs .\root
You want to use .\root to use the local admin user rather than the remote one.
Fix 2nd monitor
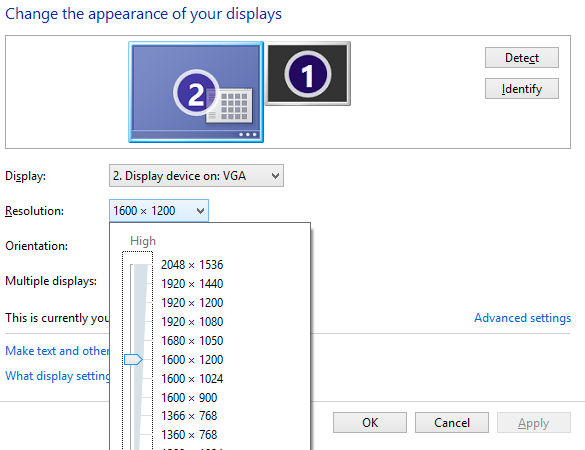
(From Q) On all of the machines there is a script c:\monitor_config\fakemon.vbs that will detect if the second screen is missing. Add it if necessary then adjust the resolution.
Windows basics
Command Prompt
Aka cmd.exe, you can start it by clicking on the "start" button and then click on "Run..."
Quick edit mode
You can change the properties of a Command Prompt to allow you to do these neat things:
- right-click to paste
- select with mouse and press enter to copy from selected text
You can do so by doing a right click on the Command Prompt window and changing the properties. You can also change the defaults settings for Command Prompts being generated in the future.
If I recall correctly, this feature was requested for RelOps to deploy to all of our Windows machines.
runas
In many places you can right click and run a process as root. However, sometimes you would want to do that from the command prompt.
runas /user:root command_that_you_want
Screen resolution
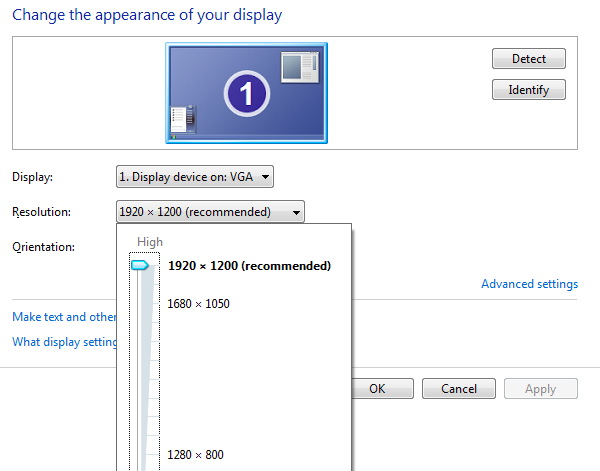
Manually: You can do a right click on the desktop and click on "Properties". You can then click on the "Settings" tab.
A while ago I wrote a script that adjusts the screen resolution on Win7 machines: http://hg.mozilla.org/build/tools/file/default/scripts/support/mouse_and_screen_resolution.py
There is code to query screen resolutions.
We should find a way to prevent starting machines up with not big enough screen resolutions. We could use runslave.py or start-buildbot.bat to prevent that (since we don't have pre-flight tasks yet).
Registry
You can start the registry editor by running "regedit".
Rebooting
You can run this command (Start->Run...):
shutdown -f -r -t 0
Computer Management
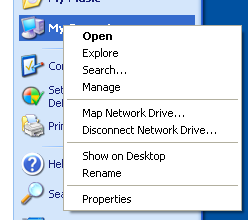
Do a "right click" on "My Computer" and click on "Manage"
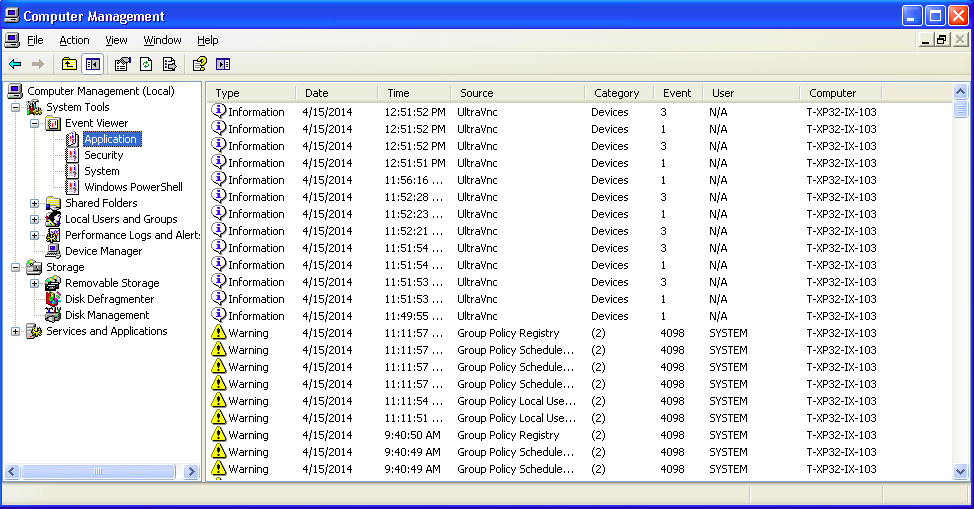
Check logs
You can review the logs of the Windows machine to debug issues.
You should things like reboot times and others.
Task Library - talosslave task
On Win7 & Win8 you can right click on the "Computer" icon and click on "Manage". For Win8, you will need to enter the admin credentials.
This will take you to the "Computer Management" window. Click on the following to reach to task library:
- System Tools
- Task Scheduler
- Task Scheduler Library
You should "talosslave" listed there which takes care of staring buildbot/runslave.py.
NOTE: To run manually the talosslave task you might need to change the property of the task.
NOTE2: I have not figured out WinXp.
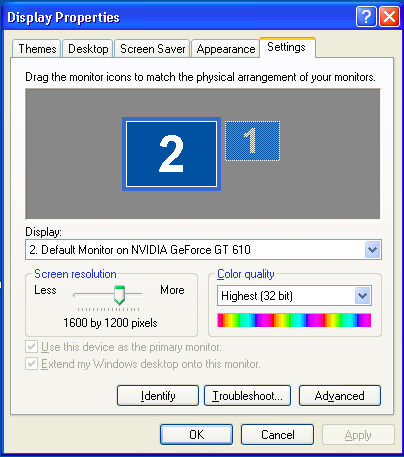
Working graphical setup
Xp
NOTE: You see two monitors unlike win7.
Win7
NOTE: Only one monitor is showing up.
